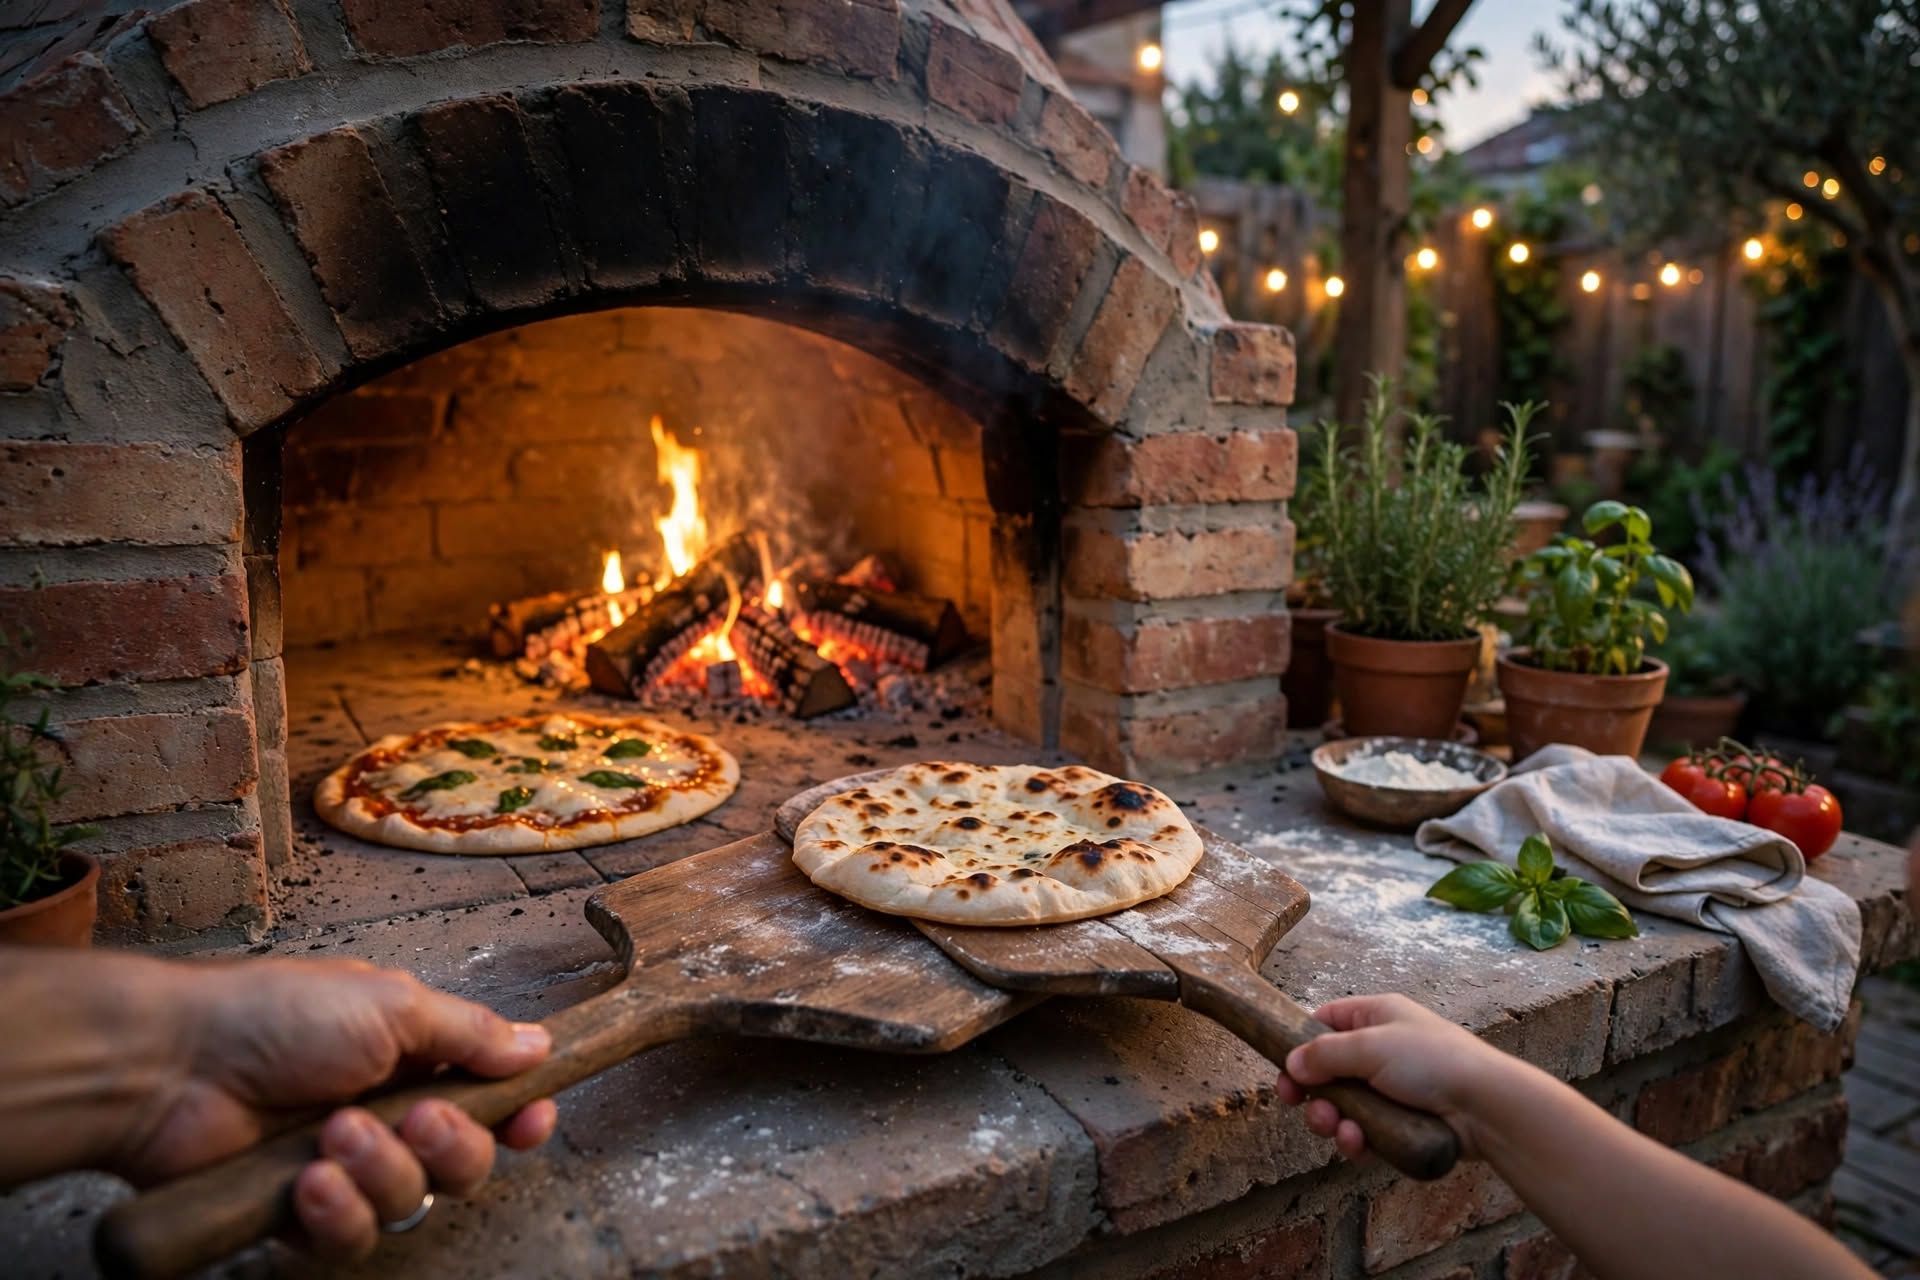

Imagine a summer evening in the backyard. The fire is glowing inside a brick oven, a wooden table is waiting beneath the pergola, and the smell of freshly baked bread drifts through the garden. Nobody is checking the time. Nobody is rushing to finish dinner.
There is something special about cooking outdoors when the cooking space feels like a permanent part of the garden rather than another appliance brought outside for the weekend.
And that is where brick comes in.
The best brick outdoor kitchens combine the warmth of traditional masonry with the practicality of modern outdoor living. They can accommodate a built-in grill, a wood-fired pizza oven, generous preparation surfaces, and even discreet storage for firewood and cooking equipment.
Unlike lightweight portable equipment, a properly designed masonry kitchen becomes part of the landscape. It develops character over time, complements natural materials, and creates a gathering place that feels equally suited to quiet family dinners and long summer evenings with friends.
But there is a difference between building something that looks beautiful and building something that works safely.
The secret is understanding which materials belong where, how the structure should be planned, and when a project requires professional help.
Here is how to approach a brick outdoor kitchen without turning your backyard into an expensive construction experiment.
Part I: 5 Common Mistakes That Can Ruin a Brick Outdoor Kitchen
Before laying the first brick, spend some time planning. Masonry is heavy, outdoor conditions are demanding, and mistakes hidden beneath the finished surface can become expensive to correct.
These are five common problems worth avoiding.
1. Building on an Inadequate Foundation
A brick outdoor kitchen is substantially heavier than a portable grill or prefabricated outdoor island.
The foundation must support the complete structure, including the masonry, countertop, cooking equipment, and any additional loads. Soil conditions, drainage, frost exposure, and the dimensions of the kitchen all influence the appropriate foundation design.
A standard patio surface should never automatically be assumed suitable for a heavy masonry installation.
The better approach: Determine the expected finished weight and have the supporting base assessed before construction. A reinforced concrete foundation may be appropriate, but its thickness, reinforcement, depth, and preparation must follow the ground conditions and structural requirements of the project.
Good drainage is equally important. Standing water around the foundation can contribute to deterioration, particularly in climates with repeated freezing and thawing.
2. Using the Wrong Bricks Around the Fire
Not all bricks are designed to withstand repeated exposure to high temperatures.
Ordinary building bricks may be suitable for appropriate parts of the exterior structure, but the cooking chamber and firebox need materials specifically intended for high-temperature service.
This is where fire bricks, also called refractory bricks, become important.
They are manufactured for applications involving repeated heating and cooling. Suitable refractory materials help create a durable cooking chamber and provide the thermal mass needed for traditional wood-fired cooking.
The better approach: Separate the structure into functional zones.
- Structural masonry supports the overall construction.
- Fire bricks line the areas exposed to intense heat.
- Refractory mortar joins compatible fire-resistant components.
- Insulation helps retain heat inside the cooking chamber.
- Exterior finishes protect the structure from weather.
Each material has a different job. Choosing products according to their intended application is more important than simply choosing the most heat-resistant product available.
3. Designing the Chimney Without Considering Airflow
An outdoor brick oven needs an appropriate way to manage smoke and combustion gases.
A chimney is not simply a decorative tower added after the masonry is complete. Its dimensions and configuration are part of the oven design.
The cooking chamber, entrance, smoke collection area, flue, and chimney work together to establish draft.
An incorrectly designed system may produce poor smoke evacuation, smoke escaping through the oven opening, or an unpleasant cooking environment.
The better approach: Plan the complete smoke path before building. Use an oven design with an established chimney configuration and follow its specifications. Where the design is custom, have the flue and smoke collection system assessed by a qualified professional.
Do not copy chimney dimensions from another oven without checking whether the cooking chamber and geometry are comparable.
4. Forgetting About Insulation
A traditional brick oven is not simply a box made from fire bricks.
Its ability to retain heat depends on the complete construction, including the cooking floor, refractory chamber, and insulation.
Without appropriate insulation, heat escapes more quickly into the surrounding structure. The oven may take longer to heat and lose useful cooking temperatures sooner.
The better approach: Treat insulation as part of the original design, not as an optional finishing detail.
Oven floors and domes may require different insulation arrangements. Choose materials rated for their intended position and temperature exposure, and make sure the external finish protects them from moisture.
5. Ignoring Weather and Fire Safety
An outdoor kitchen has to survive more than cooking temperatures.
Rain, frost, wind, humidity, and seasonal changes all affect its long-term condition.
A beautiful brick oven positioned beneath an unsuitable wooden pergola can also create a serious fire hazard.
The better approach: Choose a suitable location before construction.
Consider:
- Distance from the house, fences, wooden decking, and other combustible materials.
- Overhead branches, roof structures, and pergolas.
- Prevailing wind direction and smoke movement.
- Access to the cooking area.
- Drainage and protection from rain.
- Local building, fire, and planning requirements.
Use the clearances specified by the equipment manufacturer and applicable local regulations. Keep children, pets, furniture, and combustible objects safely away from active cooking and fire areas.
A beautiful outdoor kitchen should make outdoor cooking more enjoyable, not less safe.
Part II: Brick Outdoor Kitchen Design — The Main Components
The most successful outdoor kitchens are designed around how people actually cook.
Some homeowners want a traditional barbecue with a simple preparation counter. Others dream of a wood-fired pizza oven, a large grill, and enough workspace to prepare an entire meal outside.
The layout should reflect the cooking method rather than forcing every possible feature into one structure.
The Grill Zone
The grill is often the most frequently used part of an outdoor kitchen.
A built-in charcoal or wood-fired grill can be surrounded by brick masonry, with a suitable cooking grate and a dedicated area for handling fuel.
Before deciding on dimensions, consider:
- The size of the cooking grate.
- Access for adding fuel.
- Space for cleaning and removing ash.
- Airflow requirements.
- The position of the preparation counter.
- Manufacturer installation requirements if using a commercial grill insert.
A removable grate can make cleaning easier and provide flexibility when cooking different foods.
For a more traditional appearance, natural brick surrounds and a simple stone or concrete countertop create a timeless combination.
The Brick Pizza Oven
A wood-fired pizza oven can become the focal point of the entire outdoor kitchen.
Its appeal comes from the way it stores and distributes heat. The refractory floor and chamber absorb energy from the fire and release it during cooking.
A well-designed oven can be used for more than pizza. Depending on its construction and temperature control, it may also be suitable for flatbreads, roasted vegetables, bread, and slow-cooked dishes.
A typical masonry oven includes:
- A suitable supporting foundation.
- An insulated base.
- A refractory cooking floor.
- A fire-resistant chamber or dome.
- Appropriate insulation around the chamber.
- A designed entrance and smoke collection system.
- A compatible chimney and weather-resistant exterior finish.
The shape, opening, chamber volume, and chimney should be treated as one coordinated design.
For a first DIY project, a tested modular oven kit can be a sensible alternative to designing every component from scratch. It can simplify assembly while still allowing you to create a custom brick exterior.
The Preparation Counter
A brick outdoor kitchen becomes much more practical when it includes a dedicated preparation area.
A countertop provides space for ingredients, utensils, serving dishes, and everyday cooking equipment.
Suitable options include:
- Outdoor-rated porcelain slabs.
- Natural stone.
- Properly designed concrete countertops.
- Other weather-resistant countertop materials suitable for outdoor food preparation.
Consider how the material handles heat, moisture, staining, and cleaning.
The countertop should also be easy to wipe down and should not interfere with access to the grill or oven.
The Firewood Storage Area
A recessed firewood niche beneath a counter or oven can make the kitchen feel more traditional while keeping fuel close at hand.
However, firewood should be stored dry and protected from rain. Allow sufficient airflow rather than packing logs tightly into a closed space.
Keep stored wood away from hot surfaces and areas where sparks may land.
A simple open storage niche can be both practical and visually attractive.
Part III: Choosing Materials for a Long-Lasting Brick Outdoor Kitchen
The materials determine not only how your outdoor kitchen looks but also how it performs after years of exposure to weather and heat.
A successful project combines structural strength, thermal performance, and weather resistance.
Structural Bricks
These form the visible body of the kitchen.
Traditional red clay bricks create a rustic appearance, while darker engineering bricks can produce a more contemporary result.
Choose products suitable for exterior masonry and the expected environmental conditions. In regions with cold winters, frost resistance and moisture exposure deserve particular attention.
Fire Bricks
Fire bricks are intended for high-temperature areas such as oven chambers and barbecue fireboxes.
Their properties differ from ordinary construction bricks. Select them according to the oven design and the manufacturer’s specifications.
Do not assume that any reclaimed brick is suitable for a cooking chamber simply because it came from an old fireplace or chimney.
Refractory Mortar
The mortar used in high-temperature areas must be compatible with the refractory bricks and the intended application.
Some products are designed for specific joint thicknesses or particular curing conditions. Others are unsuitable for prolonged outdoor exposure.
Read the technical data sheet before purchasing.
For example, a refractory product intended for indoor fireplace repairs should not automatically be substituted for an exterior oven mortar.
Insulation Materials
Insulation helps reduce heat loss from the cooking chamber.
Depending on the design, suitable ceramic-fibre products, insulating boards, or other purpose-made refractory insulation may be used.
Their temperature rating, installation position, and protection requirements should be checked carefully.
Countertops and Finishes
The countertop is where practical requirements and visual design meet.
Natural stone offers individual patterns and a timeless appearance. Porcelain provides a wide range of stone-inspired finishes and is available in outdoor-suitable products.
Concrete can create a more industrial or rustic look, while brick surrounds add continuity to the masonry.
Choose finishes that tolerate the expected outdoor conditions and can be maintained without complicated treatments.
Part IV: How Much Does a Brick Outdoor Kitchen Cost?
A DIY brick outdoor kitchen can be more affordable than a fully custom installation, but the final cost depends heavily on the design.
A simple brick grill is a very different project from a complete outdoor kitchen with a pizza oven, chimney, countertops, sink, storage, and pergola.
Rather than relying on one universal price, separate the budget into categories.
| Component | What to include |
|---|---|
| Foundation | Excavation, base preparation, concrete and reinforcement |
| Structural masonry | Exterior bricks, blocks and suitable mortar |
| Firebox | Fire bricks and refractory mortar |
| Oven insulation | Insulating boards, blankets and compatible materials |
| Chimney | Flue components and installation materials |
| Cooking equipment | Grill grate, oven door and accessories |
| Countertop | Stone, porcelain or outdoor-rated concrete |
| Finishing | Weather protection, exterior detailing and sealing |
| Tools | Masonry tools, mixing equipment and protective equipment |
| Additional costs | Delivery, waste removal and professional inspections |
The original construction budget of $640–$1,350 can be used only as an illustrative materials estimate for a relatively simple project, not as a reliable price for a complete outdoor kitchen.
Prices vary by location, material quality, delivery costs, and construction complexity. A full installation may cost considerably more.
Where Can You Save Money?
There are several ways to control costs without compromising the important parts of the construction.
Keep the design simple.
A compact grill and preparation counter are less complicated than a full kitchen with multiple cooking appliances.
Use a standard oven design.
A tested modular or documented oven design can reduce the uncertainty associated with custom chamber geometry.
Choose materials strategically.
Use appropriate structural masonry for the exterior and reserve specialist refractory materials for the areas that actually require them.
Plan before purchasing.
Accurate measurements and a complete materials list help prevent unnecessary deliveries and leftover materials.
Do not economize on critical components.
The foundation, firebox materials, insulation, chimney, and fire-safety provisions are not places to experiment with unsuitable substitutes.
Saving money is useful. Having to rebuild the oven is not.
Part V: Planning Your DIY Brick Outdoor Kitchen Step by Step
Building a brick outdoor kitchen is a substantial project, but careful planning makes the process easier to understand and manage.
For a homeowner without masonry experience, a straightforward grill surround or a modular oven installation is a more realistic starting point than a complex custom-built oven.
Step 1: Choose the Location
Look at the garden from several angles.
Where does the wind usually travel? Where will smoke go? Is the proposed location close to a wooden fence, house wall, roof, or overhanging branches?
Consider access from the indoor kitchen, available space for dining, and the position of existing pathways.
Check local planning and fire requirements before committing to the location.
Step 2: Decide What You Want to Cook
The cooking equipment should determine the layout.
If you mainly grill vegetables and meat, a simple brick barbecue may be sufficient.
If pizza and bread are the main attraction, a dedicated oven deserves more attention.
If you regularly entertain guests, additional preparation surfaces and storage may be more valuable than another cooking appliance.
Step 3: Prepare a Complete Design
Draw the proposed kitchen from above and from the front.
Include the dimensions of the cooking equipment, countertop, storage spaces, access openings, and chimney system.
For a custom oven or heavy masonry structure, use an established construction plan or obtain professional design advice.
Step 4: Prepare the Foundation
Once the design and site have been checked, prepare the supporting base according to the structural requirements.
This may involve excavation, ground preparation, compacted sub-base material, formwork, reinforcement, and concrete.
The correct specification depends on the soil and the expected loads. Do not use a generic foundation dimension as a substitute for a proper assessment.
Step 5: Build the Structural Masonry
The exterior brickwork forms the visible body of the kitchen.
Follow the chosen design carefully, paying attention to level, alignment, bonding, openings, and support for countertops and cooking components.
Allow for the required clearances and expansion considerations around hot components.
If the structure includes heavy arches, unsupported spans, or unusual load-bearing arrangements, seek professional masonry advice.
Step 6: Install the Cooking Components
The firebox, cooking floor, oven chamber, and chimney must be installed according to the selected system.
Use compatible refractory materials and the correct insulation.
Do not improvise the dimensions of the cooking chamber or flue after construction has begun. Changes to one part of the system can affect airflow and thermal performance elsewhere.
Step 7: Finish and Protect the Exterior
Complete the countertop, weather protection, and decorative elements.
Check that water cannot collect in vulnerable areas and that the insulation system is protected as specified.
Allow the masonry and refractory materials to cure and dry according to the manufacturers’ instructions before introducing heat.
Part VI: The First Firing — The Detail That Protects Your Oven
After the masonry is complete, it can be tempting to light a large fire immediately.
Resist that temptation.
Mortar and other construction materials may retain moisture. Heating them too quickly can cause steam pressure, cracking, and damage to the oven.
The correct curing process depends on the refractory mortar, cast components, insulation system, construction method, and environmental conditions.
There is no universal four-day schedule that works for every brick oven.
A More Careful Approach
1. Allow the construction to cure.
Follow the specified curing period for each product. Some materials require several days, while complete oven systems may have substantially longer waiting periods.
2. Check the manufacturer’s instructions.
Look for recommendations covering drying, ventilation, initial heating, and maximum temperature increases.
3. Begin with controlled heating.
When the manufacturer permits initial firing, follow the specified gradual heating procedure. Avoid large fires and sudden temperature changes.
4. Allow cooling between stages if required.
Some oven systems specify cooling intervals between initial heating stages. Follow the actual installation instructions rather than a generic schedule.
5. Inspect before normal cooking.
Look for unexpected cracking, loose components, damage, or signs of moisture problems. Have significant defects assessed before using the oven.
Patience here is not simply good craftsmanship. It protects the investment you have made in the entire structure.
Part VII: What to Cook First in Your New Brick Oven
Once the oven has been properly cured and approved for normal use, the fun begins.
A simple flatbread or pizza is a good first cooking project because it helps you understand how the oven behaves.
Pay attention to the temperature of the cooking floor, the distribution of heat, and the way food cooks in different parts of the chamber.
A wood-fired oven is not identical to a conventional electric oven. Its cooking environment depends on the stored heat in the masonry, the fire, and the airflow.
Once you become familiar with the oven, explore other dishes.
Homemade Flatbread
Flatbread is a wonderful way to start. It requires relatively few ingredients and allows you to experiment with cooking temperatures and placement.
Wood-Fired Pizza
Pizza is perhaps the most recognizable use for a traditional brick oven.
A properly heated cooking floor and suitable oven temperature help create a crisp base and a beautifully cooked crust.
Roasted Vegetables
Vegetables such as peppers, courgettes, aubergines, and onions work particularly well in a hot oven.
Use suitable cookware and adjust the cooking method to the oven’s temperature.
Slow-Roasted Dishes
Some masonry ovens retain useful heat after the fire has died down.
This stored heat can be used for slower cooking, provided the oven has been designed for the intended method and the temperature is monitored carefully.
Every oven develops its own cooking characteristics. Learning them is part of the pleasure.
Part VIII: Brick Outdoor Kitchen Ideas for Different Backyards
Not every garden needs a large masonry installation.
The most attractive outdoor kitchens are often the ones that fit their surroundings rather than dominate them.
1. The Compact Brick Barbecue
A simple brick grill with a small preparation counter works well in modest gardens.
Choose a restrained design, keep the materials consistent, and use the surrounding landscaping to soften the masonry.
2. The Rustic Brick Pizza Oven
A traditional pizza oven creates an unmistakable focal point.
Pair warm red brick with natural stone, a wooden dining table, and simple garden planting.
A pergola can complete the setting, provided its materials and position meet the oven’s fire-safety requirements.
3. The Full Outdoor Cooking Kitchen
For larger gardens, a more complete arrangement may include a grill, pizza oven, preparation counter, storage, and a suitable outdoor sink.
The key is to create distinct areas for cooking, preparing food, and serving.
Do not let the visual appeal of a large installation distract from practical access, ventilation, drainage, and maintenance.
4. The Modern Brick Kitchen
Brick does not have to look traditional.
Dark masonry, simple geometric forms, smooth concrete, and restrained outdoor furniture can create a more contemporary appearance.
The combination of textured brick and clean architectural lines is particularly effective.
Frequently Asked Questions
How long does it take to build a brick outdoor kitchen?
The timeline depends on the design, foundation work, weather, curing requirements, and the builder’s experience.
A simple brick grill may take considerably less time than a complete kitchen with a custom pizza oven and chimney.
Do not plan the project around a fixed weekend schedule. Allow sufficient time for foundation work, masonry, curing, and inspections.
Do I need to be a professional mason?
Not necessarily for every part of the project.
A homeowner with basic DIY skills may be able to handle straightforward preparation, decorative masonry, and the assembly of a suitable modular oven system.
However, structural foundations, complex arches, custom fireboxes, and chimney systems require appropriate technical knowledge. Professional advice is preferable whenever the design involves structural or fire-safety uncertainty.
Can I use regular bricks for an outdoor kitchen?
Suitable ordinary building bricks may be used for parts of the exterior structure, depending on their specifications and exposure conditions.
Areas exposed to direct fire and repeated high temperatures require appropriate refractory materials.
Always follow the construction system’s material specifications.
How do I maintain a brick outdoor oven?
Allow the oven to cool before cleaning.
Remove loose ash and food debris using suitable tools. Clean the cooking surface according to the manufacturer’s recommendations and avoid introducing water into a hot oven.
Inspect the exterior masonry, mortar joints, chimney, and weather protection periodically.
Address water ingress and significant deterioration before they become larger problems.
Does a brick outdoor kitchen need a roof?
Not necessarily.
An appropriately designed open-air kitchen can function without a roof. However, suitable weather protection may help preserve the countertop, masonry finishes, and equipment.
A pergola or roof must be designed with the required fire clearances and ventilation in mind. Never assume that a timber structure is safe simply because the oven is outdoors.
Is a brick outdoor kitchen worth the investment?
For homeowners who regularly cook and entertain outdoors, it can be a worthwhile long-term improvement.
A well-planned masonry kitchen offers a permanent cooking area, opportunities for custom design, and a strong visual connection with the garden.
Its value depends on the quality of construction, suitability for the property, and how often the space will actually be used.
The Final Fire
A brick outdoor kitchen is more than a collection of bricks, mortar, and cooking equipment.
It is a place built around the simple pleasure of making food outside, watching the fire, and sharing a meal without feeling that the evening has to end.
There is something satisfying about a structure that becomes part of the garden rather than something that needs to be packed away when the weather changes.
The bricks hold their place. The countertop waits for the next meal. The oven becomes familiar with every firing.
And eventually, the most important part of the kitchen has very little to do with construction.
It is the people gathered around it.
You do not need to build the biggest outdoor kitchen in the neighbourhood. You need a thoughtful design, suitable materials, and a safe construction that works for the way you live.
Start with a plan. Choose the right bricks. Respect the fire.
And when the first pizza comes out of your finished oven, with a crisp crust and a little smoky flavour, you will understand why a simple outdoor cooking space can become the heart of an entire garden.
Happy homemaking.